http://lifecraftsandwhatever.blogspot.com/2012/01/dawn-vinegar-soap-scum-killa.html
So it's pretty simple. Heat up some vinegar (I used a cup of vinegar and nuked it for 2 minutes). Then pour it in your spray bottle, add an equal amount of blue Dawn (the website comments were pretty specific about getting the blue kind), shake gently, and voila!
Again, that's a one to one ratio of white vinegar to blue Dawn. I measured out a cup of each originally, but only used about half of my bottle. So next time I'll just do a half cup of each. The whole point is that the white vinegar is heated up, and while I haven't used it with it being room temperature and don't know if it'd work just as well, I'd rather just make it fresh each time. Especially if it's going to give me super clean results.
Feb 19, 2012
Roman Shades
Here are some of the ideas for roman shades that I love:
http://johnsjournal-maria.blogspot.com/2010/07/roman-shade-how-to.html
http://blog.effortless-style.com/2010/06/diy-no-sew-faux-roman-shade/
http://johnsjournal-maria.blogspot.com/2010/07/roman-shade-how-to.html
http://blog.effortless-style.com/2010/06/diy-no-sew-faux-roman-shade/
Jun 2, 2011
Pig Cake
Pig Cake
■1 box (18.25 Oz. Box) Yellow Cake Mix
■1 stick Margarine (softened)
■1 can (14 Oz. Can) Mandarin Oranges, Drained, 1/2 Cup Juice Reserved
■4 whole Eggs
■1 teaspoon Vanilla Extract
■FOR THE TOPPING:
■1 package (4 Oz. Box) Vanilla Instant Pudding Mix
■1 can (20 Oz. Can) Crushed Pineapple, Juice Reserved
■½ cups Powdered Sugar
■4 ounces, fluid Frozen Whipped Topping (such As Cool Whip)
■Extra Mandarin Orange Slices, For Garnish
Preparation Instructions
Preheat oven to 350 degrees. For the cake, combine cake mix, margarine, 1/2 cup juice from the mandarin oranges, eggs, and vanilla. Beat for four minutes on medium-high. Add drained oranges and beat again until pieces are broken up and small. Pour batter into greased and floured 9 x 13 inch baking pan and bake for 25 to 30 minutes, or until golden brown and set. Remove from oven and cool completely. If desired, turn out cake onto a large platter.
Once cake is cool, blend juice from drained pineapples with the vanilla pudding mix. Add powdered sugar and mix, then mix in whipped topping. Stir in drained pineapple. Spread on cooled cake and refrigerate several hours.
To serve, cut cake into squares and top each square with a mandarin orange slice.
May 29, 2011
Ultimate Chocolate Chip Cookie n’ Oreo Fudge Brownie Bar!!!
Ultimate Chocolate Chip Cookie n’ Oreo
Fudge Brownie Bar
1 cup (2 sticks) butter, softened
1 cup granulated sugar
3/4 cup light brown sugar
2 large eggs
1 Tablespoon pure vanilla extract
2 1/2 cups all-purpose flour
1 teaspoon baking soda
1 teaspoon salt
2 cups (12 ounces) milk chocolate chips
1 pkg Double Stuffed Oreos
1 Family Size (9×13) Brownie mix
1/4 cup hot fudge topping
Preheat oven to 350 degrees F. Cream the butter and both sugars in a large bowl with an electric mixer on medium speed for 3-5 minutes. Add the eggs and vanilla and mix well to thoroughly combine. In a separate bowl, whisk together the flour, baking soda and salt, then slowly incorporate into the mixer until the flour is just combined. Stir in chocolate chips. Spread the cookie dough in the bottom of a 9×13 baking dish that’s been lined with wax paper and sprayed with cooking spray. Top with a layer of Oreos. Mix together brownie mix, adding an optional 1/4 cup of hot fudge topping to the mix. Pour the brownie batter over the cookie dough and Oreos. Bake at 350 degrees F for 45-55 minutes.
To half this recipe for an 8×8 brownie mix, just half the chocolate chip cookie dough ingredients. Enjoy!
Recipe from www.kevinandamanda.com/
Fudge Brownie Bar
1 cup (2 sticks) butter, softened
1 cup granulated sugar
3/4 cup light brown sugar
2 large eggs
1 Tablespoon pure vanilla extract
2 1/2 cups all-purpose flour
1 teaspoon baking soda
1 teaspoon salt
2 cups (12 ounces) milk chocolate chips
1 pkg Double Stuffed Oreos
1 Family Size (9×13) Brownie mix
1/4 cup hot fudge topping
Preheat oven to 350 degrees F. Cream the butter and both sugars in a large bowl with an electric mixer on medium speed for 3-5 minutes. Add the eggs and vanilla and mix well to thoroughly combine. In a separate bowl, whisk together the flour, baking soda and salt, then slowly incorporate into the mixer until the flour is just combined. Stir in chocolate chips. Spread the cookie dough in the bottom of a 9×13 baking dish that’s been lined with wax paper and sprayed with cooking spray. Top with a layer of Oreos. Mix together brownie mix, adding an optional 1/4 cup of hot fudge topping to the mix. Pour the brownie batter over the cookie dough and Oreos. Bake at 350 degrees F for 45-55 minutes.
To half this recipe for an 8×8 brownie mix, just half the chocolate chip cookie dough ingredients. Enjoy!
Recipe from www.kevinandamanda.com/
Sep 9, 2010
Puffy Paint
Puffy Paint
Here's another one in the 'non-edible' category ... but I painted the cutest snack with it! Super simple, super easy! And I think it has the sweet look of frosting!!! I like to use this for painting puffy pumpkins at Halloween time (and add a little green curling ribbon to the top stem), cupcakes to celebrate birthdays, white for Santa's beard at Christmas ... the possibilities are endless!Here's what you need: glue, shaving cream, food coloring
Here's what you do: Mix 1 part glue to 1 part shaving cream (eye-ball it), and add food coloring to desired color.
Jul 9, 2010
Easy Paneling Idea from Shanty2Chic!
I love the girls over at Shanty2chic! They have such great ideas and the Easy Paneling idea is something I've seen in blogland. I'm so happy they've included a tutorial and lot's of pics. I already have all the supplies but the wood so am thinking of doing this is Little A's room to display his trophies from sports. Here is the finished project on their blog!
Decisions...Decisions!
I just found that Costco does collage mouse pads...and I am in real NEED of some new pads for our computers! I put together some samples, but can't decide on which ones to order. Hate it when that happens!
Jul 7, 2010
YUMMY!!! Mini Cheesecakes
One of my favorite recipe blogs is OurBestBites.com! I've used MANY of the recipes on the blog and they have all been keepers in my house (which says a lot because of the picky eaters in my house)!!! Well, I've been itching to make the mini cheesecakes and finally did them for the 4th of July weekend. They were DELISH! I made a double batch to take to some BBQ's and deliver to friends but had lot's left over...so much for all the exercise I've been doing! My cheesecakes didn't look as pretty as the picture you see above, but who cares. Like I always tell my kids, "they'll just get all jumbled up in your mouth when you eat them." Funny thing is that when I was putting the recipe in my binder, I found another recipe I made in Jr. High that was almost IDENTICAL! Funny how I've had the recipe in my stash for over 20 years, but never used it. Just reminds me how visual I am and seeing a photo of something makes it so much more apealling!
Recipe by Our Best Bites
12 Nilla Wafer Cookies
2 8oz packages cream cheese
3/4 C sugar
2 Tbs flour
1/4 tsp baking powder
1 Tbs fresh lemon juice
2 eggs
1 1/2 tsp vanilla
Foil cupcake liners
Optional Toppings:
canned pie filling
fresh berries
whipped cream
chocolate sauce
caramel sauce
lemon curd
Preheat oven to 375. Soften cream cheese if needed. With an electric mixer, beat cream cheese and sugar. Add in flour and baking powder and beat to combine. Then add in eggs, one at a time, lemon juice, and vanilla. Beat to combine.
Fill a muffin pan with cupcake liners and place one vanilla wafer at the bottom of each one. Divide batter between 12 muffin papers, filling each cup up to about 1/4 inch from the top. Bake for 15-18 minutes or until a toothpick comes out clean. They'll puff way up during baking, but they'll settle after being chilled.
When you take them out of the oven, place them on a cooling rack and let them cool completely. While they cool, they will sink down in the center. Don't worry- that's normal! It makes the perfect little well to fill up with the fruit filling. Before you top them, chill in the fridge for at least 4-6 hours or preferably over night. Then top and serve. You can be creative and top with whatever you like, like chocolate, caramel, lemon curd, whatever! Makes 12 cheesecakes.
Jul 6, 2010
Interchangeable Flip Flops
Ok...tonight I put on the $2 pair of flip flops I just bought at Old Navy and thought to myself, "boy these look ugly and plain". Then low and behold, it's 12:20am and I'm scrapbooking and looking at blogs and found a great link on Someday Crafts to make some interchangeable flip flops shown at MakeIt-LoveIt. I have seriously got to add going by my school on tomorrows (I mean today's) TO DO list to get the 'super' glue and Velcro tucked away in my classroom so I can make some of these Flip Flops!!!! CAAA-UUU-TTTT!!!
Jun 28, 2010
Egg Carton Deco!
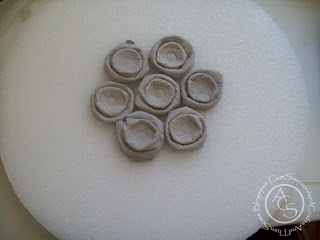
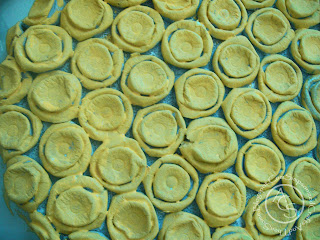
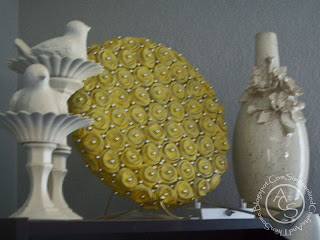
Here is a project I found Someday Crafts from Simpsonized Crafts and Then Some that is made by using egg cartons, styrofoam, paint and beads. Just wanted to link so I remember it’s something I want to make before school starts in August.
Jun 25, 2010
One Cure for Summer Boredom….
Picture a perfect summer evening. After 2 1/2 hours at Jake’s practice, I decided it was the perfect time to start a project I had in the garage so started refinishing a bench for my class. I sanded it down with a hand sander and pulled out the paint. The boys were bored….so I asked if they wanted to help paint. Will, our neighbor jumped right up and said “yes”! It was so funny because he couldn’t wait to get going with the roller brush. I put them ALL to work and had the bench painted in no time at all.
I didn’t get a photo of it, but Jake sat on the bench a bit to soon and painted the back of his shirt and shorts to match the bench…Great!!!
Will, Jake, and Austin hard at work.
The finished product (and just figured out how to do the watermark with the blog logo).
Jun 16, 2010
Summers make me DOMESTIC!!!
Look what I made today....homebread bread and strawberry freezer jam!!! I used the Ball Freezer jam packet thingee and just followed the directions! Yummy!!!
Apr 25, 2010
Laundry Tips!
I know this post may not be too exciting...but this is what's on my mind tonight. And if I blog it, I won't lose the info!!! Ha. After cruising around blogworld for ways to get hard water off my faucets, I was intrigued by all the postings about how to make "cheap" laundry soap. You all know the Dugger's???!!! They are the reality tv family with a zillion kids. Not much of a fan of the show (but I know Elyse LOVES them..haha), but there are all kinds of postings raving about the soap they use for laundry....and they must do a boatload of laundry. So you know me. I went out, bought me some ingredients...and the rest is history.
Powdered Laundry Soap:
1 Fels-Naptha soap bar
1 Cup - Arm & Hammer Super Washing Soda (not baking soda..you find it in laundry detergent section)
½ Cup Borax
-Grate soap or break into pieces and process in a food processor until powdered. Mix all ingredients. For light load, use 1 Tablespoon. For heavy or heavily soiled load, use 2 Tablespoons. Yields: 3 Cups detergent. (Approx. 40 loads)
The 'ingredients' cost about $5 and got them at my local Winco. I should have taken a photo of Jake's baseball pants the other day. They are brand new WHITE pants and were filthy after his last game. There was that icky red dirt and he LOVES to slide. He also had grass stains all over the knees and had chocolate from his after game snack after using the pants as a napkin. I did rub a bar of the soap over the tougher stains, filled my washer with hot water and soaked the pants for about 15 minutes before starting the cycle. I was shocked when they came out good as new!!! Not a stain anywhere. Fabric Softener: Ok, I can't STAND to pay $7 or more for a stupid little bottle of Downy. But, I do love the smell. So I tried a tip on using vinegar in the wash cycle in place of fabric softener. I just pour the vinegar right into my fabric softener dispenser and it WORKS LIKE A CHARM!! Doesn't make anything smell bad and I haven't noticed the static cling...which is mainly why I use fabric softener. Nevada is DRY!!! (The bumper stickers also say its not a wasteland, but I beg to differ.) Anyway, this is one tip that worked for me and vinegar is like $1.50 at my local WallyMart.
Ok...sorry for the boring post but thought someone could use a helping hand in the laundry room. Thank heavens I have two helping hands....named TiM! One of the benefits of him being home on medical leave is that he does most the laundry. Can I get a "Hip hip hooray" for Tim!!
Apr 2, 2010
Happy Easter to My Peeps!
Happy Easter to all my 'peeps' out there! I made the Easter treat below for some of you here in town. Isn't it the cutest idea!!!! I found it on a new blog...just click the little house over there on the left of my blogpage for the link and other CUTE ideas for Easter.
Here is the direct link to the snack toppers: Eighteen25 Peep Download.
The cute bunny silhouette is my next project and I already have the "Egged" pictures printed and eggs stuff to put in some of the neighbors yards...CUTE!
Here is the direct link to the snack toppers: Eighteen25 Peep Download.
The cute bunny silhouette is my next project and I already have the "Egged" pictures printed and eggs stuff to put in some of the neighbors yards...CUTE!
Apr 1, 2010
Bunny Silhouette
Here is my bunny silhouette as seen as Eighteen25.blogspot.com. I did it while the boys watched “Alvin & the Chipmunks” (the Squeakquel) and ended up using a frame that already had a mat. I just taped the rabbit to the outside of the glass, which you can’t tell at all and I can use the frame for the next season’s silhouette…or even one of the boy’s that I WILL get done this weekend!
Mar 21, 2010
Fabric Diaper Wipe Tutorial
One night I babysat for my neighbor, and she had this adorable diaper wipe case. I thought, “I can make this” so I looked online and found a few blogs with instructions.
All I needed was some batting , some cute felt like material, and a diaper wipe case.
1) First trace around the diaper wipe caseto get the pattern, cut out fabric and batting, then glue batting to top and bottom of case.
2) start at back and glue on fabric, 3) pull tight and glue fabric to front of case, then around the sides. 4) Trim fabric with scissors if needed, 5)then glue ribbon all around the top and bottom edge. Presto…YOU’RE DONE!
My friend Tami even came over this afternoon and made one for her grandson out of the cute animal print below. Forgot to snap a photo of her finished product.
If you want, you can make a cute butterfly by looping the ribbon 2x and then hot gluing it to the top of the case. then cut about 1 1/2 inch body and glue over the looped ‘wings’. I also used a little piece of ribbon to make antennae…which you can’t really see in the picture. Turned out really cute…and Tami wants to come back next week for another craft!
All I needed was some batting , some cute felt like material, and a diaper wipe case.
1) First trace around the diaper wipe caseto get the pattern, cut out fabric and batting, then glue batting to top and bottom of case.
2) start at back and glue on fabric, 3) pull tight and glue fabric to front of case, then around the sides. 4) Trim fabric with scissors if needed, 5)then glue ribbon all around the top and bottom edge. Presto…YOU’RE DONE!
My friend Tami even came over this afternoon and made one for her grandson out of the cute animal print below. Forgot to snap a photo of her finished product.
If you want, you can make a cute butterfly by looping the ribbon 2x and then hot gluing it to the top of the case. then cut about 1 1/2 inch body and glue over the looped ‘wings’. I also used a little piece of ribbon to make antennae…which you can’t really see in the picture. Turned out really cute…and Tami wants to come back next week for another craft!
Mar 20, 2010
Making Donuts...
The boys got a craving for donuts, so we made some homemade ones. They were pretty good, but the house smelt like grease for weeks so I think we'll stick to buying them at Smith's from now on!
Mar 10, 2010
Cute Journal Idea!
This is a cute journal idea from Lisa Bearnson...love her blog!
Instead of writing the normal journal stuff, she writes some type of service she did for someone that day (outside of the norm--no laundry can be recorded here). Maybe it's as simple as a text message to someone who needs cheering up or more elaborate like surprising the mail man with Krispy Kreme doughnuts! She also record five things she's grateful for. It's easy to keep up on, reminds us all to serve others and can help us realize what a wonderful world we live in.
Subscribe to:
Posts (Atom)